You can hide filtered rows. A filter button is displayed in the column header for a column that allows filtering. The user can click on the button and select the item they wish to filter by and they can sort the list of items.
The following image displays the Filter dialog.

The user can use the mouse or various keyboard keys to interact with the filter dialog. The Esc key can be used to cancel the dialog. The Tab key can be used to move to different sections and the up and down arrow keys can be used to move in the list of items. The Spacebar can be used to change the checked status.
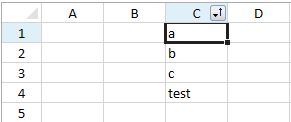
The following image shows the list sorted in ascending order.
You can create a filter in code with the RowFilter property and the HideRowFilter class.
The following example creates a row filter.
| CS |
Copy Code
|
|---|---|
GrapeCity.Windows.SpreadSheet.Data.CellRange cellrange = new GrapeCity.Windows.SpreadSheet.Data.CellRange(0, 0, 5, 1); GrapeCity.Windows.SpreadSheet.Data.HideRowFilter hideRowFilter = new GrapeCity.Windows.SpreadSheet.Data.HideRowFilter(cellrange); gcSpreadSheet1.Sheets[0].RowFilter = hideRowFilter; |
|
| VB.NET |
Copy Code
|
|---|---|
Dim cellrange As New GrapeCity.Windows.SpreadSheet.Data.CellRange(0, 0, 5, 1) Dim hideRowFilter As New GrapeCity.Windows.SpreadSheet.Data.HideRowFilter(cellrange) GcSpreadSheet1.Sheets(0).RowFilter = hideRowFilter GcSpreadSheet1.Invalidate() |
|