You can create custom floating objects.
You can resize a floating object with the mouse or Shift + Arrow or Ctrl + Shift + Arrow keys. You can move a floating object by dragging it using the Shift key and the mouse.
You can use the right or left mouse button to select a floating object. You can also use the Tab or Shift + Tab key to select the object.
Normal shortcut keys for cut, copy, and paste apply to floating objects. You can use the Ctrl key and the mouse to drag and copy the object.
Floating objects can be imported or exported to XLSX or XML files.
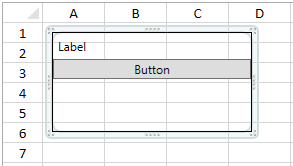
The following image displays a custom floating object.
The following code creates a floating object.
| CS |
Copy Code
|
|---|---|
| public class MyFloatingObject : GrapeCity.Windows.SpreadSheet.UI.CustomFloatingObject { public MyFloatingObject(string name, double x, double y, double width, double height) : base(name, x, y, width, height) { } public override FrameworkElement Content { get { Border border = new Border(); StackPanel sp = new StackPanel(); sp.Children.Add(new Label() { Content = "Label" }); sp.Children.Add(new Button() { Content = "Button" }); border.BorderThickness = new Thickness(1); border.BorderBrush = new SolidColorBrush(Colors.Black); border.Child = sp; return border; } } } //add instance of this floating object into worksheet MyFloatingObject mf = new MyFloatingObject("mf1", 10, 10, 200, 100); gcSpreadSheet1.ActiveSheet.FloatingObjects.Add(mf); |
|
| VB.NET |
Copy Code
|
|---|---|
| Public Class MyFloatingObject Inherits GrapeCity.Windows.SpreadSheet.UI.CustomFloatingObject Public Sub New(name As String, x As Double, y As Double, width As Double, height As Double) MyBase.New(name, x, y, width, height) End Sub Public Overrides ReadOnly Property Content() As FrameworkElement Get Dim border As New Border() Dim sp As New StackPanel() sp.Children.Add(New Label() With { _ .Content = "Label" _ }) sp.Children.Add(New Button() With { _ .Content = "Button" _ }) border.BorderThickness = New Thickness(1) border.BorderBrush = New SolidColorBrush(Colors.Black) border.Child = sp Return border End Get End Property End Class 'add instance of this floating object into worksheet Dim mf As New MyFloatingObject("mf1", 10, 10, 200, 100) GcSpreadSheet1.ActiveSheet.FloatingObjects.Add(mf) |
|