In a page report and RDL report, you can set grouping to organize data in your reports. The most common grouping scenario is to create groups by fields or expressions in a data region.
Depending on the data region you select, you can group data in one of the following ways:
- In a Table or Banded List, you can add group header and footer rows. You can also set detail grouping in the Table data region.
- In a List, you can set detail grouping.
- In a Tablix, you can add columns and rows either dynamically or manually to group data.
- In a Classic Chart , you can group data by categories or series.
To group in a data region
Detail Grouping is useful when you do not want to repeat values within the data on display in the report.
- From the Visual Studio toolbox, drag and drop a Table data region onto the design surface.
- With the Table selected on the report, under the Properties Window, click the Property dialog link to open the Table dialog > Detail Grouping page.
- In the Detail Grouping page, under Group on enter the expression on which you want to group the data. For e.g., =Fields!YearReleased.Value
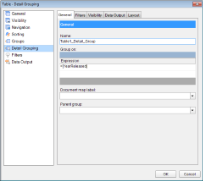
Table - Detail Grouping Dialog
Note: A default group name like Table1_Detail_Group1 appears under Name, until you set the grouping expression under Group On, after which you can modify the group name. - Under the Document map label, you can optionally set a label to add the item to the document map. See Document Map for further information.
- Under Parent group, you can optionally set the parent group for a recursive hierarchy.
- Click OK to close the dialog.
- Drag and drop fields onto the Table data region and go to the preview tab to see grouped data.
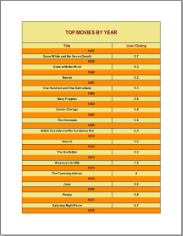
Grouped data
To group in a FixedPage
In a Page Report, you can group your data on the fixed page. A group set on the fixed page, applies to the entire report including the controls within the report. Therefore, once you set grouping here, you may decide not to group individual data regions.
Use the following steps to understand grouping on a fixed page. These steps assume that you have already added a Page Report template, connected it to a data source and created a dataset. See Quick Start and Connect to a Data Source for further information.
- Right-click the gray area outside the design surface and select Fixed Layout Settings or with the fixed page selected, under the Properties Window, click the Property dialog link to open the FixedPage dialog.
- On the Grouping page, in the General tab, under Group on enter the field name or expression on which you want to group the data. For example,
=Fields!YearReleased.Value.Note: A default group name like FixedPage1_Group appears under Name, once you set the group. To modify the group name, add a field name or expression under Group on to enable the Name option and enter a new name. - Under the Document map label field, you can optionally set a label to add the item to the document map.
- Click OK to close the dialog.
- Drag and drop a data region, like a Table onto the design surface and set data inside its cells.
- Go to the Preview Tab to view the result. You'll notice that the data appears in groups sorted according the YearReleased field on each report page.
Grouping in a Fixed Page
Detail Grouping
Detail grouping is available in the List and Table data regions. It is useful when you do not want to repeat values within the details. When you set detail grouping, the value repeats for each distinct result of the grouping expression instead of each row of data.
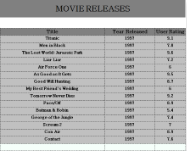
For example, if you use the Movie table of the Reels database to display movie titles by year without setting detail grouping, you see each year as many times as there are movies from that year.
If you set detail grouping to =Fields!YearReleased.Value, each year appears only once.
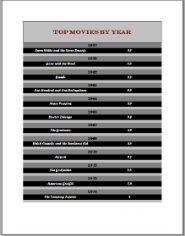
Detail Grouping
Recursive Hierarchies
If you want to display parent-child relationships in your data, you can create a recursive hierarchy. To do this, you need a unique ID field for the child group and an ID field for the parent group.
For example, if you have pulled data from the Reels database using the following SQL query:
| SQL Query |
Copy Code
|
|---|---|
| SELECT EmployeePosition.*, Employee.*, Employee_1.PositionID AS ManagerPosition FROM Employee AS Employee_1 RIGHT JOIN (EmployeePosition INNER JOIN Employee ON EmployeePosition.PositionID = Employee.PositionID) ON Employee_1.EmployeeID = Employee.ManagementID; | |
You can set Detail Grouping in a Table data region using the =Fields.Item("EmployeePosition.PositionID").Value field, and the =Fields!ManagerPosition.Value field as the parent group to display parent-child relationships in your data.

Recursive Hierarchies
Level Function
To better visualize data in a recursive hierarchy, you can use the Level function. This function indents text and further clarifies the relationships between parent and child data. To do this, you set an expression in the Padding - Left property of the text box you want to indent.
For example, in a Table data region, for the recursive hierarchy example above, you can set the following expression in the Padding - Left property of the text box that contains the Title to indent values according to levels:
=Convert.ToString(2 + (Level()*10)) & "pt"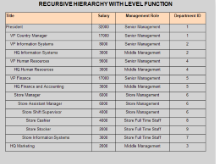
Level Function