ActiveReports 18 .NET Edition
Report Authors: Designer Components / Report Controls / Page/RDLX Report / Image
In This Topic
    Image
    In This Topic

    The Image report control displays an image that you embed in the report, add to the project, store in a database, or access through a URL. You can choose the Image Source in the Properties window after you place the Image report control on the report.

    The supported image formats are Base64 string, Byte[], BMP, JPG, JPEG, JPE, GIF, PNG, EMF, WMF, and SVG.

    Important Properties

    By clicking on the Image control, you can set its properties in the Properties window.

    Property Description
    AccessibleDescription Enter the alternative description of the control for use by accessibility client application. The property on exporting the report adds the ‘alternative text’ in PDF and ‘alt’ attribute in HTML.
    Action From Navigation Dialog choose one of the actions to carry out at runtime.
    MIMEType Choose MIME Type from the dropdown.
    Size Enter the Width and Height of the image.
    Sizing Specify the way an image should be sized within the image report control.
    Source Select the source of the image from External, Embedded, or Database.
    Value Depending on the Source chosen specify the path of the image.

    Image Dialog Properties

    You can set the Image properties in the Image dialog. To open it, with the Image selected on the report, under the Properties window, click the Property dialog link. 

    Name: Enter a name for the image that is unique within the report. This name can be called in code. You can only use underscore (_) as a special character in the Name field. Other special characters such as period (.), space ( ), forward slash (/), backslash (\), exclamation (!), and hyphen (-) are not supported.

    Tooltip: A textual label for the report item used to include TITLE or ALT attributes in HTML reports.

    Image Value: Enter the name of the image to display. Depending on the Image Source chosen below, you can give a path to the image, select an image to embed, or pull images from a database. This property also allows you to choose the <Data Visualizer...> option to launch a dialog that will let you build a data visualization expression.

    Image Source: Select whether the image comes from a source that is External, Embedded, or Database.

    MIME Type: Select the MIME type of the image chosen.

    Initial visibility

    • Visible: The image is visible when the report runs.
    • Hidden: The image is hidden when the report runs.
    • Expression: Use an expression with a Boolean result to decide whether the image is visible. True for hidden, False for visible.

    Visibility can be toggled by another report item: Select this check box to display a toggle image next to another report control. This enables the drop-down box below where you can specify the TextBox control that toggles the visibility of the image. The user can click the toggle item to show or hide this image.

    Action

    Select one of the following actions to perform when a user clicks on this image.

    None: The default behavior is to do nothing when a user clicks the image at run time.

    Jump to report: For drill-through reporting, select this option and provide the name of a local report, the relative path of a report in another folder, or the full path of a report on another server.

    Parameters: Supply parameters to the targeted report by entering the Name of each parameter, the Value to send to the targeted report, or whether to Omit the parameter. Note that the parameter names you supply must exactly match the parameters in the target report. You can remove or change the order of parameters using the X and arrow buttons.

    Jump to bookmark: Select this option and provide a valid Bookmark ID to allow the user to jump to the report control with that Bookmark ID.

    Jump to URL: Select this option and provide a valid URL to create a hyperlink to a Web page.

    Apply Parameters: Select the Name, the Type, and the Value of the parameter to set a parameter value through user action. See Actionable Parameters for more information.

    Document map label: Enter an expression to use as a label to represent this item in the table of contents (document map).

    Bookmark ID: Enter an expression to use as a locator for this image. You will then be able to provide a bookmark link to this item from another report control using a Jump to bookmark action.

    Image Features

    Embedded Images

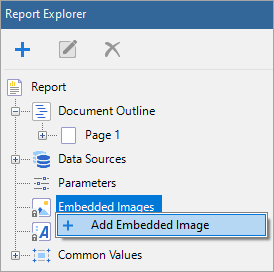
    The benefit of using an embedded image is that there is no separate image file to locate or to keep track of when you move the report between projects. The drawback is that the larger the file size of the image you embed, the more inflated your report file size becomes.

    To embed an image in your report:

    1. From the Report Explorer, right-click Embedded Images.
      Embedding an image into a report
    2. Select Add Embedded Image and navigate to an image file from your local files.
    3. Now that the image is embedded in the report and appears under Embedded Images, drag-drop the image to the design area.
      The MIMEType, Source, and Value properties are filled in automatically and the image file's data is stored in the report definition.

    Data Visualizer Images

    You can use a data visualizer to display data in small graphs that are easy to comprehend. To add a data visualizer image to your report:

    1. Select the Image control and in the Properties window, drop down the Value property and select <Data Visualizer...>.
    2. In the Data Visualizers dialog that appears, select the Visualizer Type that you want to use - Icon Set, Range Bar, Data Bar, Gradient, or Hatch.
    3. Use expressions related to your data to set other values in the dialog. 

    SVG Images

    There are several cases where you can use an SVG image:

    Image files with the mime-type image/svg+xml are allowed, which you can set in the MimeType property of the Image control.

    See Also