The quick start guides you through the steps of adding the FlexGrid control to your MVC application and populate data in it. The following example demonstrates local model binding in FlexGrid control. For detailed explanation on how to do remote binding in FlexGrid, see Remote Data Binding topic.
Create a new MVC application using the ComponentOne or VisualStudio templates. For more information about creating an MVC application, see Configuring your MVC Application topic.
Sale.cs). See Adding controls to know how to add a new model.| Sale.cs |
Copy Code
|
|---|---|
    public class Sale
    {
        public int ID { get; set; }
        public DateTime Start { get; set; }
        public DateTime End { get; set; }
        public string Country { get; set; }
        public string Product { get; set; }
        public string Color { get; set; }
        public double Amount { get; set; }
        public double Amount2 { get; set; }
        public double Discount { get; set; }
        public bool Active { get; set; }

        public MonthData[] Trends { get; set; }
        public int Rank { get; set; }

        /// <summary>
        /// Get the data.
        /// </summary>
        /// <param name="total"></param>
        /// <returns></returns>
        public static IEnumerable<Sale> GetData(int total)
        {
            var countries = new[] { "US", "UK", "Canada", "Japan", "China", "France", "German", "Italy", "Korea", "Australia" };
            var products = new[] { "Widget", "Gadget", "Doohickey" };
            var colors = new[] { "Black", "White", "Red", "Green", "Blue" };
            var rand = new Random(0);
            var dt = DateTime.Now;
            var list = Enumerable.Range(0, total).Select(i =>
            {
                var country = countries[rand.Next(0, countries.Length - 1)];
                var product = products[rand.Next(0, products.Length - 1)];
                var color = colors[rand.Next(0, colors.Length - 1)];
                var date = new DateTime(dt.Year, i % 12 + 1, 25, i % 24, i % 60, i % 60);

                return new Sale
                {
                    ID = i + 1,
                    Start = date,
                    End = date,
                    Country = country,
                    Product = product,
                    Color = color,
                    Amount = rand.NextDouble() * 10000 - 5000,
                    Amount2 = rand.NextDouble() * 10000 - 5000,
                    Discount = rand.NextDouble() / 4,
                    Active = (i % 4 == 0),
                    Trends = Enumerable.Range(0, 12).Select(x => new MonthData { Month = x + 1, Data = rand.Next(0, 100) }).ToArray(),
                    Rank = rand.Next(1, 6)
                };
            });
            return list;
        }
    }

    public class MonthData
    {
        public int Month { get; set; }
        public double Data { get; set; }
    }
}
|
|
Complete the following steps to initialize a FlexGrid control.
Add a new Controller
IndexController).| C# |
Copy Code
|
|---|---|
public ActionResult Index() { return View(Sale.GetData(15)); } |
|
Add a View for the controller:
Default1Controller) to open it.Index().Index.cshtml to open it.| Index.cshtml |
Copy Code
|
|---|---|
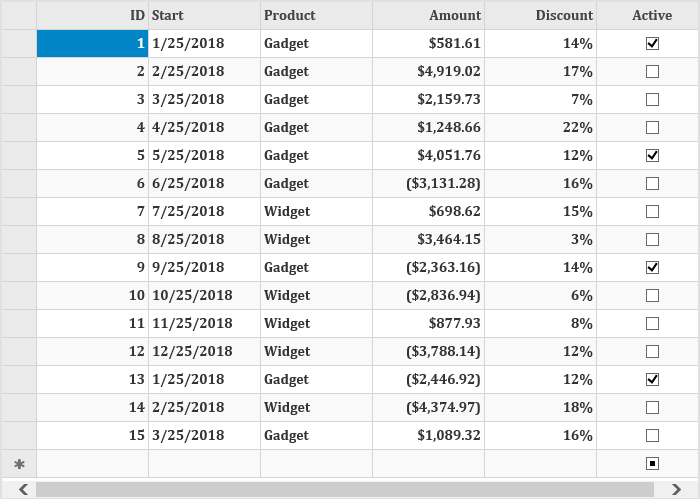
@using <ApplicationName>.Models @using C1.Web.Mvc.Grid @model IEnumerable<Sale> <style type="text/css"> .grid { height: 500px; border: 2px solid #e0e0e0; font-family:Cambria; font-weight:bold; } </style> <c1-flex-grid auto-generate-columns="false" width="800px" class="grid" is-read-only="true" allow-add-new="true" allow-sorting="true" selection-mode="@((SelectionMode.Cell))" > <c1-items-source source-collection="@Model"></c1-items-source> <c1-flex-grid-column binding="ID"></c1-flex-grid-column> <c1-flex-grid-column binding="Start"></c1-flex-grid-column> <c1-flex-grid-column binding="Product"></c1-flex-grid-column> <c1-flex-grid-column binding="Amount" format="c"></c1-flex-grid-column> <c1-flex-grid-column binding="Discount" format="p0"></c1-flex-grid-column> <c1-flex-grid-column binding="Active"></c1-flex-grid-column> </c1-flex-grid> |
|