EventsCalendar shows Day, Week, Month and List views as default views. You can easily change the events calendar to show custom views by adding new views(such as two weeks or two months) having ViewType set to "Custom". You can customize the data view of the C1EventsCalendar control at design time using the Properties window, in Source view, and in Code.
Complete the following steps to add four custom views, 2 Days, 2 Weeks, 2 Months and 2 Years, and to set the active ViewType to 2 Months.
In Source View
Switch to Source view and modify the <cc1:C1EventsCalendar> tags.
<cC1:C1EventsCalendar runat="server" ID="C1EventsCalendar1" Width="60%" Height="475px">
   <Views>
        <cC1:View Type="Day">
        </cC1:View>
        <cC1:View Type="Custom" Name="2 Days" Unit="Day" Count="2">
    </cC1:View>
        <cC1:View Type="Custom" Name="2 Weeks" Unit="Week" Count="2">
        </cC1:View>
        <cC1:View Type="Custom" Name="2 Months" Unit="Month" Count="2" IsActive ="true">
        </cC1:View>
        <cC1:View Type="Custom" Name="2 Years" Unit="Year" Count="2">
    </cC1:View>
  </Views>
</cC1:C1EventsCalendar>
In the Properties Window
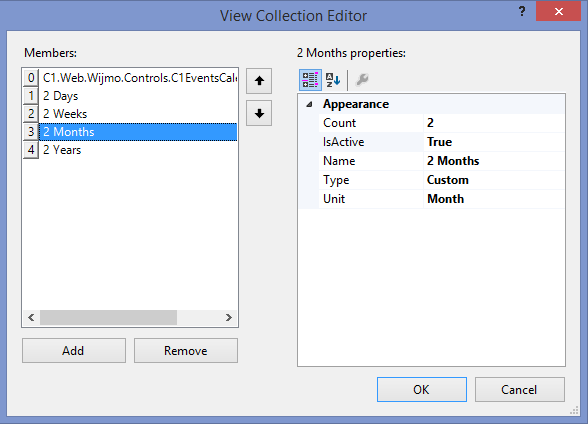
In Code
| Visual Basic |
Copy Code
|
|---|---|
C1EventsCalendar1.Views[2].IsActive = true
|
|
| C# |
Copy Code
|
|---|---|
C1EventsCalendar1.Views[2].IsActive = true;
|
|
What You've Accomplished
When you run the project, EventsCalendar appears as shown in the image below.
