In This Topic
The following quick start guides you through the steps of creating a simple resolution-independent user detail input form by adding different controls to the grid layout. In this quick start, you add a Sizer control to your application and create a layout by adding controls such as text boxes and labels.
Set Up the Application
- Create a new Windows Forms app.
- Configure your project and set the Framework.
- Drag and drop the Sizer control from the Toolbox onto the form and set its Dock property to Fill so it takes up the whole form.
Observe: Sizer control gets added to the form. At this point, the Sizer control does not have a grid layout set up yet, or any child controls, so it displays a message with brief instructions on how to use the control, but this can be ignored for now.
Back to Top
Create Layout at Design Time
- Right-click on the Sizer control to open the context menu, and select Edit Grid. This opens the C1Sizer Grid Editor dialog box to set up the grid layout. The C1Sizer Grid Editor appears similar to the following image:
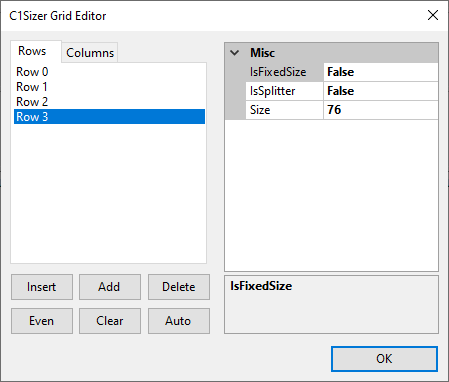
- From the C1Sizer Grid Editor, click on the Rows tab from the left pane. Now, click on the Add button to add rows to the layout. Similarly, click on the Columns tab, and add columns to the layout. In this example, we are adding 8 rows and 8 columns to the grid layout.
You can position the editor next to the grid so you can see the effect of the changes on the control.
Click OK to close the C1Sizer Grid Editor.
- Add TextBox and Label controls from the Toolbox onto your form. In this example, we added 8 TextBox and 8 Label controls to the form.
Observe: The controls snap to the grid layout.
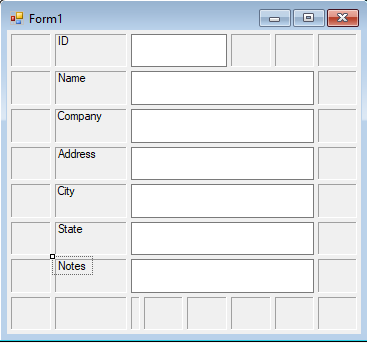
Note: Remember to set the MultiLine property of the TextBox controls to True, or they will not resize vertically. Also, when you place a text box control on the form it automatically expands to three columns.
In the above steps, you started with adding the Sizer, then the grid and the controls to create a layout. A similar layout can be created by working the other way around. For this, after you add the Sizer control to the form, you can add the controls and then the grid. Then, right-click the Sizer control and select the AutoGrid option from the context menu. This creates a grid based on the position of the child controls. Also, change the C1Sizer.SplitterWidth property of Sizer to a small value, say one or two pixels so that the buttons which are positioned very close can stay the same way on adding the grid. Furthermore, the layout can also be created using code. For more information, see, Add Controls using code section in Add Controls topic.
Back to Top
Configure the Layout
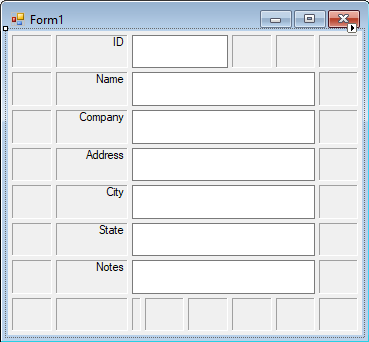
- Drag the second column to the left so there is enough space for the labels, then select the cursor over each row and drag it upward to make the height of each row smaller.
- From the Properties window, set each Label controls' AutoSize property to False and TextAlign property to TopRight. The labels will appear like the following:
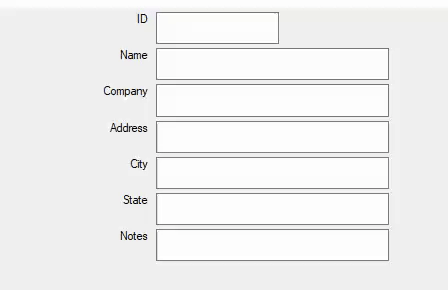
Run the project to see that the text boxes and labels get automatically resized when you resize the form.
Back to Top