Step 5 of 5: Running the Application
In This Topic
Now that you have created a Silverlight project with a C1Menu control and a C1ContextMenu control, the only thing left to do is run the project and observe the results of your work.
Complete the following steps:
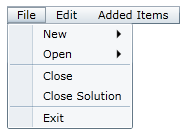
- From the toolbar, select Debug | Start Debugging to run the application. The application appears as follows:

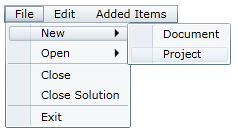
- Click File and observe that a submenu appears.
- Hover your cursor over New and observe that another submenu appears.
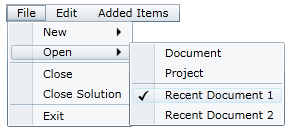
- Hover your cursor over Open and observe that another submenu appears. Note that Recent Document 1 is checked.
- Click Recent Document 2.
The Open submenu closes.
- Select File | Open and observe that Recent Document 2 is checked instead of Recent Document 1.
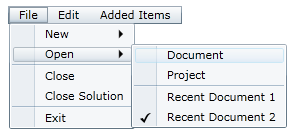
The two checkable items, Recent Document 1 and Recent Document 2, are grouped together to form a list of mutually exclusive checkable items. You can read more about this by visiting the Checkable Menu Items topic.
- Click Edit and observe that the Edit submenu appears.
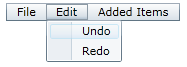
- Click Added Items and observe that it has no submenu.
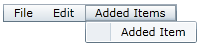
- Right-click the menu to bring up the context menu.
- On the context menu, click Add Item.

- Click Added Items and observe that it has a submenu consisting of one new item, which is named Added Item.
Congratulations!
You have completed the Menu for Silverlight quick start.