This article explains connecting a Section report to a SQL data source.
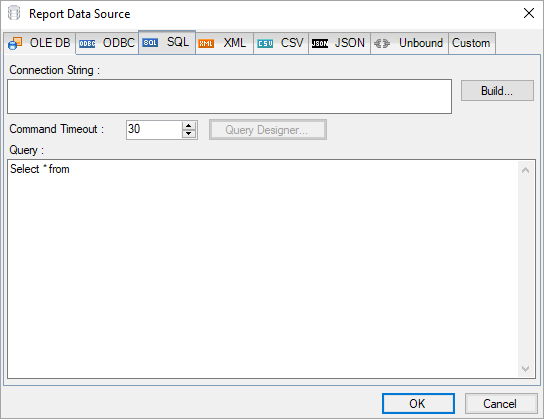
data source=10.64.1.85\sql_2k8r2;persist security info=False;initial catalog=auditing;user id=sa;password=**********;SELECT * FROM LocationThe SQL Data Provider provides the following configuration settings in the Report Data Source dialog.
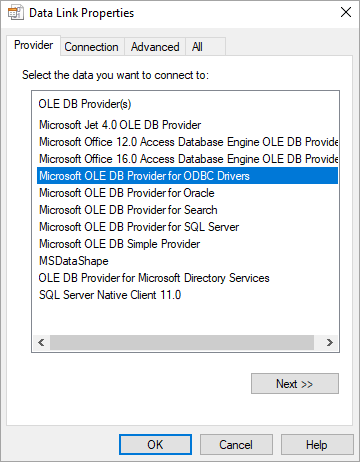
The Provider tab describes the type of OLEDB provider you want to use for connecting to a data source. You can choose from the following -
The Connection tab specifies the properties required for accessing the data. The properties in the tab depend upon the OLEDB provider you want to use.
For Microsoft JET 4.0 OLE DB Provider and Microsoft OLE DB Provider, following properties are available in the Connection tab -
| Setting | Description |
|---|---|
| Select or enter a database name | Enter a server or a file name along with its location. |
| Enter information to log on to the database | Specify the username and password required to access the database. |
For Microsoft Office 12.0 Access Database Engine OLE DB Provider, Microsoft Office 12.0 Access Database Engine OLE DB Provider, Microsoft OLE DB Provider for ODBC Drivers, Microsoft OLE DB Simple Provider, MSDataShape, and OLE DB Provider for Microsoft Directory Services, following properties are available in the Connection tab -
| Setting | Description |
|---|---|
| Enter the data source and/or location of the data | Enter a server or a file name along with its location. |
| Enter information to log on to server | Select whether to use Windows authentication or server authentication which requires a user name and password. Below this field you can also check the Save my password option for future reference. |
| Enter initial catalog to use | Specify the name of the database you want to connect. |
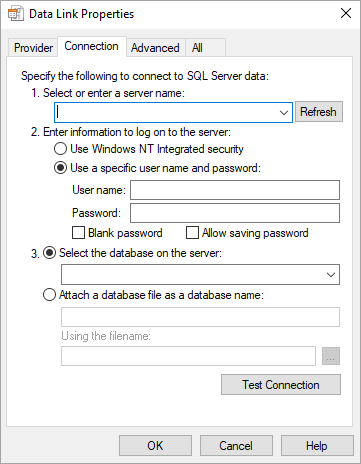
For Microsoft OLE DB Provider for SQL Server and SQL Server Native Client 11.0, following properties are available in the Connection tab -
| Setting | Description |
|---|---|
| Select or enter server name | Select your server from the drop down list. |
| Enter information to log on to the server | Select whether to use Windows authentication or server authentication which requires a user name and password. Below this field you can also check the Save my password option for future reference. |
| Select the database on the server | Select a database from the server or attach a database file. |
The Advanced tab gives access to the initialization properties required by the chosen OLEDB provider.
| Setting | Description |
|---|---|
| Impersonation Level | Set the impersonation level to any of the following options - Anonymous, Delegate, Identify, and Impersonate. |
| Protection Level | From the drop down, choose Call, Connect, None, Pkt, Pkt Integrity, or Pkt Privacy. |
| Connect Timeout | Specify the amount of time (in seconds) for a connection to establish. |
| Access Permissions | Specify the access permissions on the database, such as Read, ReadWrite, Share Deny None, Share Deny Read, and Share Deny Write. |
The All tab lets you view and edit the initialization properties available for the selected OLEDB provider. These properties can differ based on the OLEDB provider you want to use.