Step 1 of 4: Adding NumericBox to Your Project
In This Topic
In this step you'll begin in Visual Studio to create a WPF or Silverlight application using NumericBox for WPF and Silverlight. When you add a C1NumericBox control to your application, you'll have a complete, functional numeric editor. You can further customize the control to your application.
Complete the following steps:
- In Visual Studio, select File | New Project.
- In the New Project dialog box, select either Windows Desktop or Silverlight from the Templates in the left-hand pane.
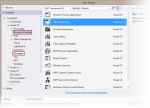
New Project Dialog Box
-
- Select WPF Application or Silverlight Application, depending on the template you chose.
- Enter a Name for your project, for example "QuickStart", and click OK. In a WPF Application, the MainWindow.xaml file will open.
- If you selected a Silverlight Application, when you click OK, the New Silverlight Application dialog box will appear.
- Click OK to accept default settings. This will close the New Silverlight Application dialog box and create your project.
- The MainPage.xaml file should open.
- Add the following assemblies to your application by right-clicking the References folder and selecting Add Reference:
- WPF: C1.WPF.4.dll
- Silverlight: C1.Silverlight.5.dll
- Navigate to the Toolbox and double-click the C1NumericBox icon to add the control to Window1 or MainPage.
- Click once on the C1NumericBox1 control to select it, and navigate to the Properties window.
- In the Properties window, set the following properties:
- Width = 40
- Minimum = 0
- Maximum = 9
The Width property will resize the control. The Minimum and Maximum properties will set the minimum and maximum values that are allowed in the control. Users will not be able to enter values outside of that range providing built-in data validation.
- Add four more C1NumericBox controls, and set the same properties as in step 9.
- In Design view, re-position each of the controls so that they appear next to each other and are numbered C1NumericBox1 to C1NumericBox5 from left to right.
Your application should now look similar to the following:

You've successfully created a WPF or Silverlight application, added C1NumericBox controls to the application, and customized those controls. In the next step you'll complete setting up the application.
See Also