Create Address Labels in Page Report
In This Topic
With Page reports, you can create an address label report using a List data region.
Note: The report connects to NWIND.db file that can be downloaded from
GitHub.
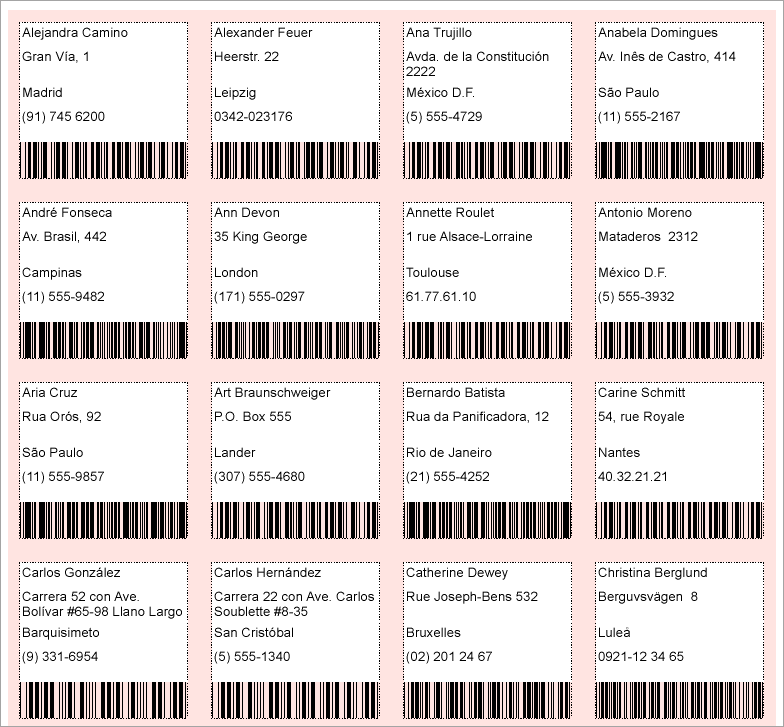
The final report will look as shown.
Create a Report
In the ActiveReports Designer, create a new Page Report.
Bind Report to Data
- As you create a new report, the Report Data Source dialog appears for you to configure the report data connection. You can also access this dialog by right-clicking the Data Sources node in the Report Explorer and then selecting the Add Data Source option.
- In the dialog, select the General page and enter a name for the data source.
- Select 'SQLite Provider'. See Custom Data Provider for more information.
- Enter the following Connection String similar to the following based on the location of the nwind.db file:
| Connection String |
Copy Code
|
data source= C:\data\nwind.db;
|
- Click OK.
- In the DataSet dialog that appears, set the Name as 'DataSet1'.
- Go to the Query page and enter the following query in the Query textbox :
| DataSet Query |
Copy Code
|
Select * from Customers order by ContactName
|
- Click the Validate DataSet icon
 at the top right hand corner above the Query box to validate the query. If there is no warning, it means the query is validated. Then click OK to close the dialog.
Design Report Layout
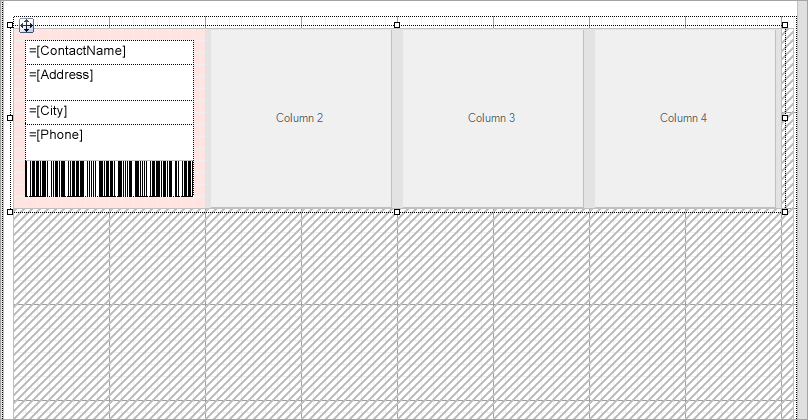
- Drag and drop List data region onto the design surface.
- Go to Report Explorer, expand DataSet1 node and drag and drop the following fields inside the List data region, one below the other, with their Value property set to the following fields:
- =Fields!ContactName.Value
- =Fields!Address.Value
- =Fields!City.Value
- =Fields!Phone.Value
- From the toolbox, drag and drop the Barcode control below =Fields!Phone.Value field, inside the List data region, and set its Value property to =Fields!PostalCode.Value.
- Select List data region and from the Properties panel, set the following:
- GrowDirection: Column
- RowsorColumnsCount: 4
- Ensure that the DataSetName property of the List data region is set to 'DataSet1'.
- You will also need to adjust the FixedSize and the Size of the List data region to accommodate the data in the specified columns and control the number of records displayed on each page.
- Set the BackgroundColor property of the list to say, 'MistyRose'.
- Improve the appearance of the report.
Preview Report
The final report is shown at the beginning of this page.
See Also