The Spread Designer provides a number of built-in dialogs that enable users to add data tables, format cells, insert functions, create forecast sheets, remove duplicates, add fill effects, etc.
You can invoke the built-in dialogs at runtime using the BuiltInDialogs class.
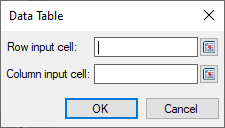
The Data Table dialog, you can prompt the user to enter the desired row or column input cells at run-time to create a data table in the Spread worksheet. The BuiltInDialogs class provides the DataTable method to invoke the DataTable dialog at runtime.
The following example code shows how to use the DataTable method to call the Data Table dialog at runtime:
| C# |
Copy Code
|
|---|---|
FarPoint.Win.Spread.Dialogs.BuiltInDialogs.DataTable(fpSpread1).Show(fpSpread1); |
|
| Visual Basic |
Copy Code
|
|---|---|
FarPoint.Win.Spread.Dialogs.BuiltInDialogs.DataTable(FpSpread1).Show(FpSpread1) |
|
For more information on data tables, see DataTable topic.
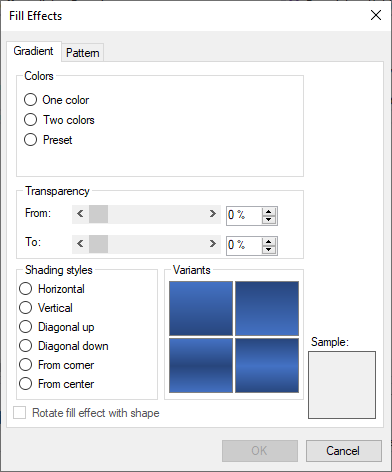
You can add fill effects like color gradients and pattern to a shape using the Fill Effects dialog, which provides options like colors, variants, shading styles, patterns, and a sample preview to view the gradient effect. You can invoke the dialog using the FillEffects method of the BuiltInDialogs class.
The following example code shows how to call the Fill Effects dialog box at runtime:
| C# |
Copy Code
|
|---|---|
FpSpread1.Features.EnhancedShapeEngine = true;
IShape shape1 = FpSpread1.AsWorkbook.ActiveSheet.Shapes.AddShape(AutoShapeType.Rectangle, 50, 100, 100, 200);
FarPoint.Win.Spread.Dialogs.BuiltInDialogs.FillEffects(FpSpread1.AsWorkbook(), ((Shape)shape1).Brush, Color.FromArgb(255, 255, 255), Color.FromArgb(0, 0, 0)).ShowDialog();
|
|
| VB |
Copy Code
|
|---|---|
FpSpread1.Features.EnhancedShapeEngine = True Dim shape1 As IShape = FpSpread1.AsWorkbook.ActiveSheet.Shapes.AddShape(AutoShapeType.Rectangle, 50, 100, 100, 200) FarPoint.Win.Spread.Dialogs.BuiltInDialogs.FillEffects(FpSpread1.AsWorkbook(), CType(shape1, Shape).Brush, Color.FromArgb(255, 255, 255), Color.FromArgb(0, 0, 0)).ShowDialog() |
|
For more information on fill effects in shapes, see Gradient Fill Effects topic.
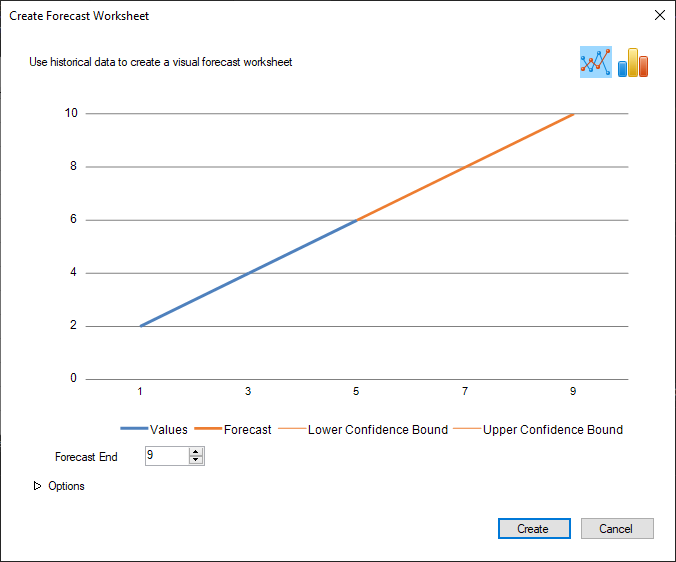
The BuiltInDialogs class provides the ForecastSheet method to create a Forecast Sheet dialog that allows to create a new worksheet that predicts data trends.
The following example code shows how to call the Forecast Sheet dialog box at runtime:
| C# |
Copy Code
|
|---|---|
IWorksheet TestActiveSheet = fpSpread1.AsWorkbook().ActiveSheet; TestActiveSheet.SetClip(0, 0, 3, 1, "1\n3\n5"); TestActiveSheet.SetClip(0, 1, 3, 1, "2\n4\n6"); TestActiveSheet.Cells["A1:B3"].Select(); FarPoint.Win.Spread.Dialogs.BuiltInDialogs.ForecastSheet(fpSpread1).Show(fpSpread1); |
|
| Visual Basic |
Copy Code
|
|---|---|
IWorksheet TestActiveSheet = FpSpread1.AsWorkbook().ActiveSheet TestActiveSheet.SetClip(0, 0, 3, 1, "1" & vbCrLf & "3" & vbCrLf & "5") TestActiveSheet.SetClip(0, 1, 3, 1, "2" & vbCrLf & "4" & vbCrLf & "6") TestActiveSheet.Cells("A1:B3").Select() FarPoint.Win.Spread.Dialogs.BuiltInDialogs.ForecastSheet(FpSpread1).Show(FpSpread1) |
|
For more information about ForeCast feature, see Forecast Sheet topic.
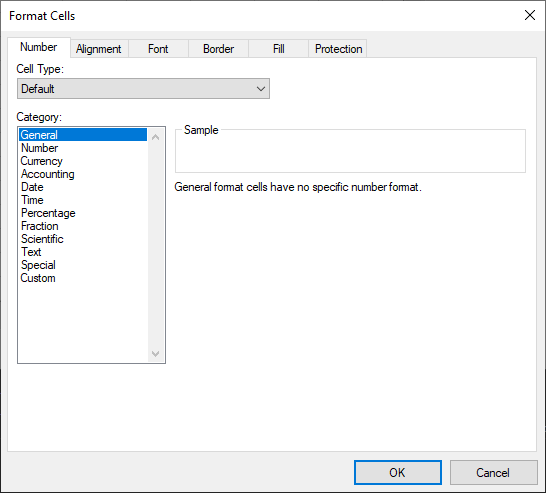
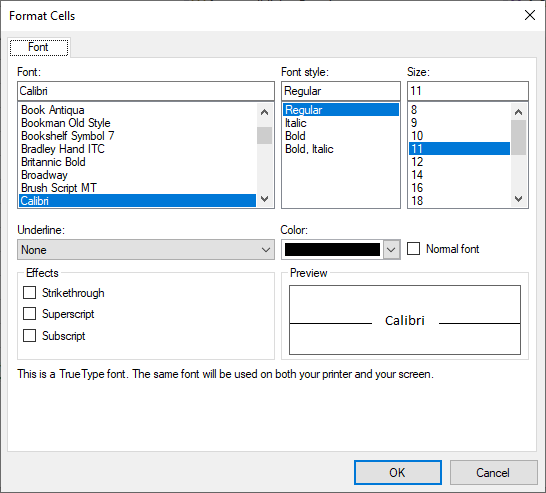
The Format Cells dialog allows the user to customize the style settings of the specified range. The BuiltInDialogs class provides the FormatCells method to invoke this dialog at runtime. The FormatCells method has two overloads, FormatCells(GrapeCity.Spreadsheet.IRange cells, [FarPoint.Win.Spread.FormatCells.FormatCellsTab activeTab = 0]) and FormatCells(FarPoint.Win.Spread.CellType.IRichTextEditor richTextEditor).
The following example code shows how to call the Format Cells dialog box to manipulate the style settings in the cell range using the FormatCells(GrapeCity.Spreadsheet.IRange cells, [FarPoint.Win.Spread.FormatCells.FormatCellsTab activeTab = 0]) method.
| C# |
Copy Code
|
|---|---|
IWorksheet TestActiveSheet = fpSpread1.AsWorkbook().ActiveSheet;
FarPoint.Win.Spread.Dialogs.BuiltInDialogs.FormatCells(TestActiveSheet.Cells["A1:B1"]).ShowDialog();
|
|
| Visual Basic |
Copy Code
|
|---|---|
IWorksheet TestActiveSheet = FpSpread1.AsWorkbook().ActiveSheet
FarPoint.Win.Spread.Dialogs.BuiltInDialogs.FormatCells(TestActiveSheet.Cells("A1:B1")).ShowDialog()
|
|
For more information on formatting cells, refer to Cell Format topic.
The FormatCells(FarPoint.Win.Spread.CellType.IRichTextEditor richTextEditor) method allows the user to format and edit the rich text in cells at run-time.
The following example code shows how to invoke the Format Cells dialog box for rich text editing:
| C# |
Copy Code
|
|---|---|
fpSpread1.Features.RichTextEdit = RichTextEditMode.On; IWorksheet TestActiveSheet = fpSpread1.AsWorkbook().ActiveSheet; TestActiveSheet.Cells["A1"].Value = "abc"; private void fpSpread1_EditModeOn(object sender, EventArgs e) { if (fpSpread1.EditingControl is IRichTextEditor richTextEditor) { FarPoint.Win.Spread.Dialogs.BuiltInDialogs.FormatCells(richTextEditor); } } |
|
| Visual Basic |
Copy Code
|
|---|---|
fpSpread1.Features.RichTextEdit = RichTextEditMode.On IWorksheet TestActiveSheet = FpSpread1.AsWorkbook().ActiveSheet TestActiveSheet.Cells("A1").Value = "abc" Private Sub FpSpread1_EditModeOn(sender As Object, e As EventArgs) If TypeOf FpSpread1.EditingControl Is IRichTextEditor Then Dim richTextEditor As IRichTextEditor = CType(FpSpread1.EditingControl, IRichTextEditor) FarPoint.Win.Spread.Dialogs.BuiltInDialogs.FormatCells(richTextEditor).ShowDialog() End If End Sub |
|
To learn about rich text editing in Spread, see Rich Text Editor topic.
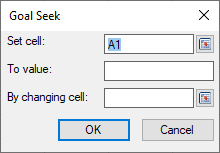
The Goal Seek dialog allows the user to calculate the values necessary to achieve a specific goal in the Spread worksheet. For this purpose, the BuiltInDialogs class provides the GoalSeek method.
The following example code shows how to call the GoalS eek dialog at runtime:
| C# |
Copy Code
|
|---|---|
IWorksheet TestActiveSheet = fpSpread1.AsWorkbook().ActiveSheet; TestActiveSheet.Cells["B1"].Formula = "A1"; TestActiveSheet.Cells["B2"].Formula = "A2"; FarPoint.Win.Spread.Dialogs.BuiltInDialogs.GoalSeek(fpSpread1).Show(fpSpread1); |
|
| Visual Basic |
Copy Code
|
|---|---|
IWorksheet TestActiveSheet = FpSpread1.AsWorkbook().ActiveSheet TestActiveSheet.Cells("B1").Formula = "A1" TestActiveSheet.Cells("B2").Formula = "A2" FarPoint.Win.Spread.Dialogs.BuiltInDialogs.GoalSeek(FpSpread1).Show(FpSpread1) |
|
To learn in detail about the Goal Seek feature, see Goal Seek topic.
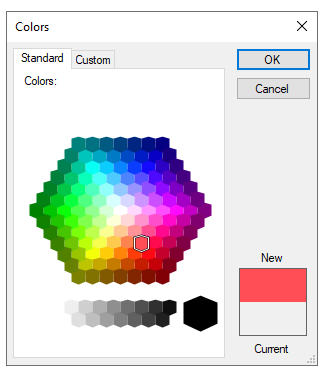
The Colors dialog allows users to choose customized colors in Spread. It lets you choose between standard and custom colors at runtime. The BuiltInDialogs class provides the MoreColors method for this purpose.
The following example code shows how to call the Colors dialog box using MoreColors method at runtime.
| C# |
Copy Code
|
|---|---|
IWorkbook activeWorkbook = fpSpread1.AsWorkbook(); IRange range = activeWorkbook.ActiveSheet.ActiveCell; FarPoint.Win.Spread.Dialogs.MoreColors colorDlg = FarPoint.Win.Spread.Dialogs.BuiltInDialogs.MoreColors(range.Font.Color, activeWorkbook); if (colorDlg.ShowDialog() == DialogResult.OK) { range.Interior.Color = colorDlg.Color; } else { colorDlg.Dispose(); return; } |
|
| Visual Basic |
Copy Code
|
|---|---|
Dim activeWorkbook As IWorkbook = FpSpread1.AsWorkbook() Dim range As IRange = activeWorkbook.ActiveSheet.ActiveCell Dim colorDlg As FarPoint.Win.Spread.Dialogs.MoreColors = FarPoint.Win.Spread.Dialogs.BuiltInDialogs.MoreColors(range.Font.Color, activeWorkbook) If colorDlg.ShowDialog() = DialogResult.OK Then range.Interior.Color = colorDlg.Color Else colorDlg.Dispose() Return End If |
|
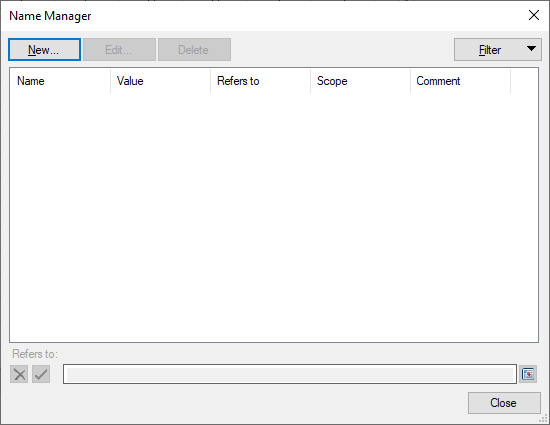
The Name Manager dialog lets you create, edit, or delete custom names in the Spread Designer. The BuiltInDialogs class provides the NameManager method to invoke the Name Manager dialog at runtime.
The following example code shows how to call the Name Manager dialog at runtime:
| C# |
Copy Code
|
|---|---|
FarPoint.Win.Spread.Dialogs.BuiltInDialogs.NameManager(fpSpread1).Show(fpSpread1); |
|
| Visual Basic |
Copy Code
|
|---|---|
FarPoint.Win.Spread.Dialogs.BuiltInDialogs.NameManager(FpSpread1).Show(FpSpread1) |
|
For more information, see Name Manager Dialog topic.
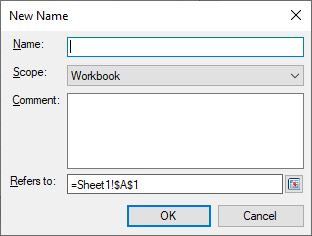
The New Name dialog allows users to create new defined names in Spread. You can create names for cell ranges, choose whether a name should be accessible within an workbook or an individual worksheet only, and also add comments, if necessary. The BuiltInDialogs class provides the NewName method to invoke this dialog at runtime.
The following example code shows how to call the New Name dialog box:
| C# |
Copy Code
|
|---|---|
FarPoint.Win.Spread.Dialogs.BuiltInDialogs.NewName(fpSpread1).Show(fpSpread1); |
|
| Visual Basic |
Copy Code
|
|---|---|
FarPoint.Win.Spread.Dialogs.BuiltInDialogs.NewName(FpSpread1).Show(FpSpread1) |
|
The Remove Duplicates dialog allows the user to remove duplicate values from a range of values. Spread allows you to invoke this dialog at runtime. For this purpose, the BuiltInDialog class provides the RemoveDuplicates method.

The following example code shows how to call the Remove Duplicates dialog at runtime:
| C# |
Copy Code
|
|---|---|
fpSpread1.ActiveSheet.SetClip(0, 1, 6, 1, "2\n1\n3\n2\n5\n3"); ActiveSheet.Cells["B1:B8"].Select(); FarPoint.Win.Spread.Dialogs.BuiltInDialogs.RemoveDuplicates(fpSpread1).ShowDialog(fpSpread1); |
|
| Visual Basic |
Copy Code
|
|---|---|
FpSpread1.ActiveSheet.SetClip(0, 1, 6, 1, "2" & vbCrLf & "1" & vbCrLf & "3" & vbCrLf & "2" & vbCrLf & "5" & vbCrLf & "3") ActiveSheet.Cells("B1:B8").Select() Dim removeDuplicatesDialog As FarPoint.Win.Spread.Dialogs.RemoveDuplicatesDialog = FarPoint.Win.Spread.Dialogs.BuiltInDialogs.RemoveDuplicates(FpSpread1) If removeDuplicatesDialog IsNot Nothing Then removeDuplicatesDialog.ShowDialog(FpSpread1) End If |
|
For more information about removing duplicates in Spread, see Removes Duplicates topic.
The Convert Text To Columns Wizard dialog lets you parse the text from one cell or column into multiple columns using a delimiter. The BuiltInDialogs class provides the TextToColumns method to invoke this dialog at runtime.
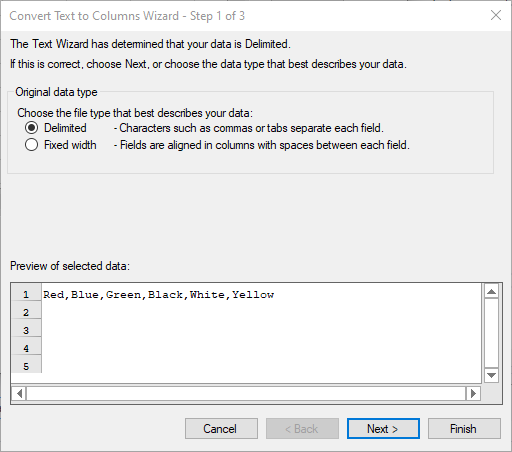
The following example code shows how to call the Convert Text To Columns Wizard dialog at runtime.
| C# |
Copy Code
|
|---|---|
IWorksheet TestActiveSheet = fpSpread1.AsWorkbook().ActiveSheet; TestActiveSheet.Cells["A1"].Value = "Red,Blue,Green,Black,White,Yellow"; FarPoint.Win.Spread.Dialogs.BuiltInDialogs.TextToColumns(fpSpread1).Show(fpSpread1); |
|
| Visual Basic |
Copy Code
|
|---|---|
IWorksheet TestActiveSheet = FpSpread1.AsWorkbook().ActiveSheet TestActiveSheet.Cells("A1").Value = "Red,Blue,Green,Black,White,Yellow" FarPoint.Win.Spread.Dialogs.BuiltInDialogs.TextToColumns(FpSpread1).Show(FpSpread1) |
|
For more information about the feature, see Text to Columns topic.
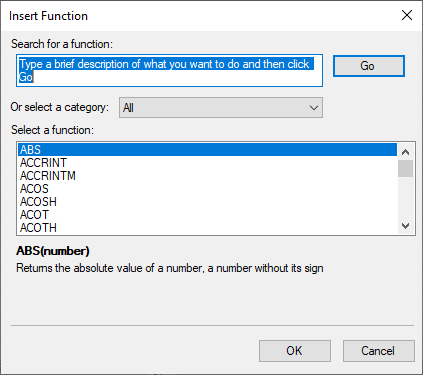
Users can call the Insert Function dialog at runtime using the ToggleInsertFunction method of the BuiltInDialogs class. The Insert Function dialog lets you search and select functions, and insert them in cells.
The following example code shows how to invoke the Insert Function dialog:
| C# |
Copy Code
|
|---|---|
FarPoint.Win.Spread.Dialogs.BuiltInDialogs.ToggleInsertFunction(fpSpread1); |
|
| Visual Basic |
Copy Code
|
|---|---|
FarPoint.Win.Spread.Dialogs.BuiltInDialogs.ToggleInsertFunction(FpSpread1) |
|
To learn more about Insert Functions, see Insert Function Dialog.