Card Layout
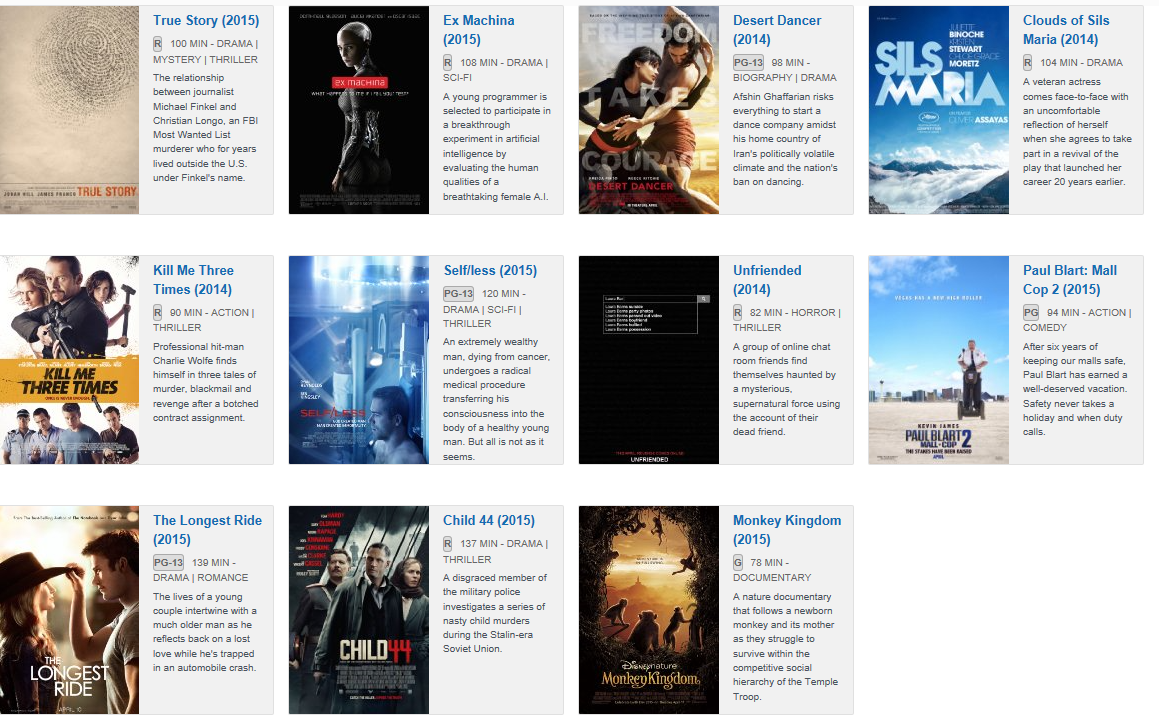
DataViewsJS provides the Card Layout. The Card Layout helps you manage two or more components that share the same display block or card. This layout engine creates blocks that are the same height and width. The Card Layout also supports Grouping and Nested Grouping. See Grouping for additional information.
In the Card Layout, the card's internal design is modified using the row templates and the presenters whereas the external design is edited using the card layout engine options.
You can choose from the following Card Layout options.
| Option | Default Value | Description |
|---|---|---|
| cardHeight | 256 | Defines the height of the card. Each card has the same height. |
| cardWidth | 256 | Defines the width of the card. Each card has the same width. |
| direction | horizontal | Defines the direction of the layout. You can choose from the following enumeration values. Horizontal - When the direction is horizontal, the layout engine tries to place all the items horizontally and then extends the space in the vertical direction. Normally a vertical scroll bar is displayed. Vertical - When the direction is vertical, the layout engine tries to place all the items vertically and then extends the space in the horizontal direction. Normally a horizontal scroll bar is displayed. |
| showScrollBar | true | Specifies whether to display the scroll bars. |
| rightToLeft | false | Enables or disables the right-to-left display. |
Use the following steps to create a horizontal grid using the CardLayout.
Sample Code
- To create a grid using the card layout, add the following references after the dataview reference.
<link rel="stylesheet" type="text/css" href="[Your Stylesheet Path]/gc.dataviews.cardlayout.min.css" />
<script src="[Your Script Path]/gc.dataviews.cardlayout.min.js"></script>
<script src="data/films.js" type="text/javascript"></script>
- Add a <div> tag within the <body> tag to include the DOM element as the container in the page. Then add the <template> element to layout the cards.
var filmCoverPresenter = '<img src="\{{=it.filmCover.posterUrl}}" alt="\{{=it.filmCover.posterTitle}}">';
var filmCoverListPresenter =
  '<img src="\{{=it.filmCover.posterUrl}}" alt="\{{=it.filmCover.posterTitle}}" class="poster-list-resize">';
var filmCategoryPresenter =
  '<div><span class="film-certification"><b>\{{=it.filmCategory.certification}}</b></span>' +
  '<span class="film-time">\{{=it.filmCategory.time}} min - </span>' +
  '<span class="film-genre">\{{=it.filmCategory.genre}}</span></div>';
var filmCategoryListPresenter =
  '<span class="film-genre">\{{=it.filmCategory.genre}}</span>' +
  '<div style="float:right"><span class="film-time">\{{=it.filmCategory.time}} min </span> ' +
  '<span class="film-certification"><b>\{{=it.filmCategory.certification}}</b></span></div>';
var filmTitleLinkPresenter =
  '<a href="\{{=it.filmTitleLink.link}}" class="film-title-link"><b>\{{=it.filmTitleLink.title}}</b></a>';
var filmDescriptionPresenter = '<div class="film-description">\{{=it.filmDescription}}</div>';
var filmDescriptionListPresenter = '<div class="film-description-list">\{{=it.filmDescription}}</div>';
- Add the column definition.
var cols = function cols(asList) {
  return [
    {
      id: 'filmCover',
      dataField: 'filmCover',
      presenter: asList ? filmCoverListPresenter : filmCoverPresenter,
    },
    {
      id: 'filmTitleLink',
      dataField: 'filmTitleLink',
      presenter: filmTitleLinkPresenter,
    },
    {
      id: 'filmCategory',
      dataField: 'filmCategory',
      presenter: asList ? filmCategoryListPresenter : filmCategoryPresenter,
    },
    {
      id: 'filmDescription',
      dataField: 'filmDescription',
      presenter: asList ? filmDescriptionListPresenter : filmDescriptionPresenter,
    },
  ];
};
- Add a function to display the cards and then the code to initialize the object which loads the Card Layout.
var cardLayoutOptions = {
  cardHeight: 250,
  cardWidth: 290,
  rowTemplate: '#filmDisplay',
  direction: 'horizontal',
};
var listLayoutOptions = {
  cardHeight: 125,
  cardWidth: 650,
  rowTemplate: '#filmDisplayList',
  direction: 'horizontal',
};

function display(asList) {
  $('#disp-lists').removeClass('active');
  $('#disp-cards').removeClass('active');

  if (asList) {
    $('#disp-lists').addClass('active');
  } else {
    $('#disp-cards').addClass('active');
  }

  dataView.columns = cols(asList);
  dataView.scrollOffset = {
    viewport: {
      top: 0,
      left: 0,
    },
  };
  var options = asList ? listLayoutOptions : cardLayoutOptions;

  _.assign(dataView.layoutEngine.options, options);

  dataView.invalidate();
}
$('#disp-lists').click(function () {
  return display(true);
});
$('#disp-cards').click(function () {
  return display(false);
});
var dataView = new GC.DataViews.DataView(
  document.getElementById('grid1'),
  data,
  columns,
  new GC.DataViews.CardLayout({
    cardHeight: 250,
    cardWidth: 290,
    rowTemplate: '#filmDisplay',
    direction: 'horizontal',
  })
);
You can also create a vertical grid using the CardLayout by changing the direction parameter from horizontal to vertical while initializing the code.
var dataView = new GC.DataViews.DataView(
  document.getElementById('grid1'),
  data,
  columns,
  new GC.DataViews.CardLayout({
    cardHeight: 250,
    cardWidth: 290,
    rowTemplate: '#filmDisplay',
    direction: 'vertical',
  })
);
Feedback
Submit and view feedback for