Version 1
Version 1
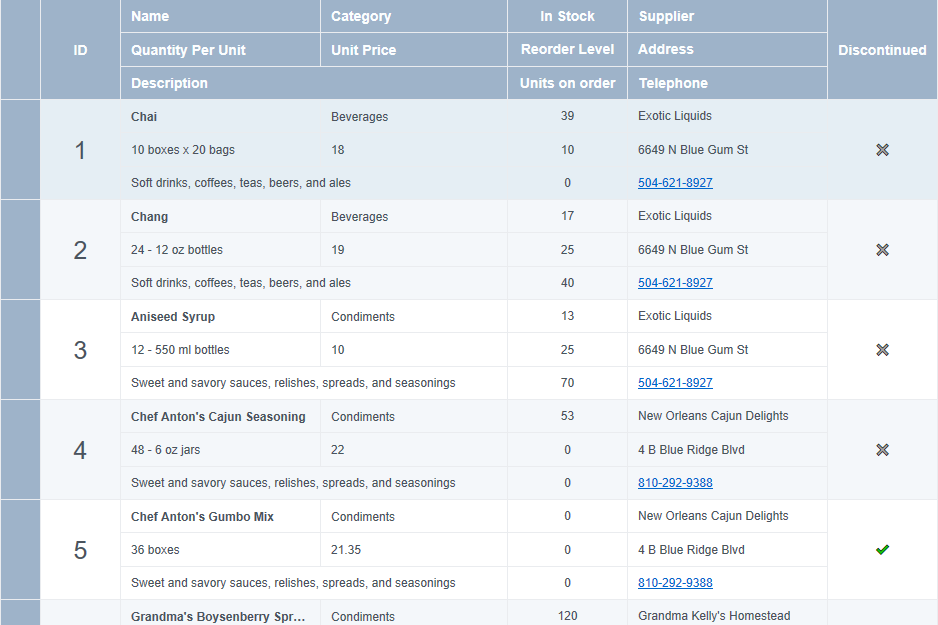
Using Row Templates
In DataViewsJS, you can use custom row templates to customize the appearance of rows. The template uses a single ID to define an absolute position for the child element. The absolute position of the child element has no effect on the parent row.
Use the following steps to modify the appearance of rows using custom templates.
Sample Code
- Define a row template using HTML syntax to display data rows.
<div id="grid1" style="height:100%"></div>
<template id="rowTmpl" style="display: none" type="text/dataView-template">
  <div style="height:100%;">
    <div
      class="gc-cell gc-cell-border"
      style="display:inline-block;vertical-align:top;width:80px;height:100px;line-height:100px;text-align:center"
      data-column="id"
      data-taborder="0"
    ></div>
    <div style="display: inline-block;vertical-align:top;height:100%;" data-column-group>
      <div style="height:33px; line-height:33px;" data-column-group>
        <div
          class="gc-cell gc-cell-border"
          style="display: inline-block; width:200px;height:100%;line-height: 33px"
          data-column="name"
          data-taborder="1"
        ></div>
        <div
          class="gc-cell gc-cell-border"
          style="display: inline-block; width:187px;height:100%;line-height: 33px"
          data-column="sku"
          data-taborder="2"
        ></div>
      </div>
      <div style="height:34px;line-height: 34px;" data-column-group>
        <div
          class="gc-cell gc-cell-border"
          style="display: inline-block;line-height: 34px; height:100%;width:200px;"
          data-column="quantityPerUnit"
          data-taborder="3"
        ></div>
        <div
          class="gc-cell gc-cell-border"
          style="display: inline-block;line-height: 34px; height:100%;width:187px;text-align:left"
          data-column="price"
          data-taborder="4"
        ></div>
      </div>
      <div
        class="gc-cell gc-cell-border"
        style="height:33px;line-height: 33px;width:387px"
        data-column="description"
        data-taborder="5"
      ></div>
    </div>
    <div style="display: inline-block;vertical-align:top;height:100%;" data-column-group>
      <div
        class="gc-cell gc-cell-border"
        style="height:33px;line-height: 33px;width:120px;text-align:center"
        data-column="inStock"
        data-taborder="6"
      ></div>
      <div
        class="gc-cell gc-cell-border"
        style="height:34px;line-height: 34px;width:120px;text-align:center"
        data-column="reorderLevel"
        data-taborder="7"
      ></div>
      <div
        class="gc-cell gc-cell-border"
        style="height:33px;line-height: 33px;width:120px;text-align:center"
        data-column="unitsOnOrder"
        data-taborder="8"
      ></div>
    </div>
    <div style="display: inline-block;vertical-align:top;height:100%;" data-column-group>
      <div
        class="gc-cell gc-cell-border"
        style="height:33px;line-height: 33px;width:200px;"
        data-column="supplier"
        data-taborder="9"
      ></div>
      <div
        class="gc-cell gc-cell-border"
        style="height:34px;line-height: 34px;width:200px;"
        data-column="location"
        data-taborder="10"
      ></div>
      <div
        class="gc-cell gc-cell-border"
        style="height:33px;line-height: 33px;width:200px;"
        data-column="telephone"
        data-taborder="11"
      ></div>
    </div>
    <div
      class="gc-cell gc-cell-border"
      style="display: inline-block;vertical-align:top;height:100px;line-height:100px;width:100px;text-align:center"
      data-column="discontinued"
      data-taborder="12"
    ></div>
  </div>
</template>
- Add a column definition after the template tag structure is defined.
var colFormatter = '<span>\{{? it.discontinued}}✔\{{??}}✖\{{?}}</span>';
var columns = [
  {
    id: 'id',
    caption: 'Product ID',
    dataField: 'ProductID',
  },
  {
    id: 'name',
    caption: 'Name',
    dataField: 'ProductName',
  },
  {
    id: 'sku',
    caption: 'Category',
    dataField: 'Category.CategoryName',
  },
  {
    id: 'description',
    caption: 'Description',
    dataField: 'Category.Description',
  },
  {
    id: 'quantityPerUnit',
    caption: 'Quantity Per Unit',
    dataField: 'QuantityPerUnit',
  },
  {
    id: 'inStock',
    caption: 'In Stock',
    dataField: 'UnitsInStock',
  },
  {
    id: 'price',
    caption: 'Unit Price',
    dataField: 'UnitPrice',
  },
  {
    id: 'discontinued',
    caption: 'Discontinued',
    dataField: 'Discontinued',
    presenter: colFormatter,
  },
  {
    id: 'reorderLevel',
    caption: 'Reorder Level',
    dataField: 'ReorderLevel',
  },
  {
    id: 'unitsOnOrder',
    caption: 'Units on order',
    dataField: 'UnitsOnOrder',
  },
  {
    id: 'supplier',
    caption: 'Supplier',
    dataField: 'Supplier.CompanyName',
  },
  {
    id: 'location',
    caption: 'Address',
    dataField: 'Supplier.Address',
  },
  {
    id: 'telephone',
    caption: 'Telephone',
    dataField: 'Supplier.Telephone',
  },
];
- Initialize the code by calling the grid ID from the DIV tag, followed by calling the row template ID.
var dataView = new GC.DataViews.DataView(
  document.getElementById('grid1'),
  data,
  columns,
  new GC.DataViews.GridLayout({
    rowHeight: 100,
    colHeaderHeight: 100,
    rowTemplate: '#rowTmpl',
  })
);
See also
Feedback
Submit and view feedback for