Migrating a WPF App in .NET Core 3.0
The first .NET Core 3.0 preview was released earlier this year, and there’s been a lot of enthusiasm from Windows desktop developers about using the preview with WinForms and WPF. Since .NET Core 3.0 will soon be the back-end for Windows desktop development, many are curious how difficult it will be to migrate their apps forward to use .NET Core 3.0.
In this article, we’ll look at both creating a new WPF project from scratch using .NET Core 3.0 as well as migrating an existing WPF project.
Create a New .NET Core 3.0 Application
In order to create a WPF .NET Core 3.0 application you will first want to install the latest version of the Visual Studio 2019 Preview. Ensure that you also install .NET Framework 4.7.2 and .NET Core 2.1 development tools in the Visual Studio Installer. These are both necessary whether you are creating a new project or migrating an old project to .NET Core 3.0.
Create a New Visual Studio Project
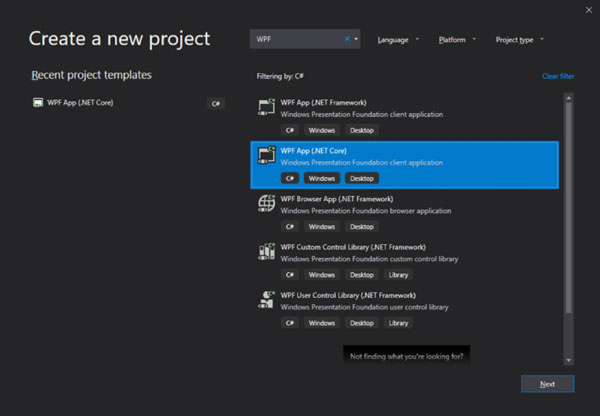
First, click “File” in the upper left corner. From there select “New” and then “Project.” The “Create a new project” menu should open up and you can now select “WPF APP (.NET Core).”
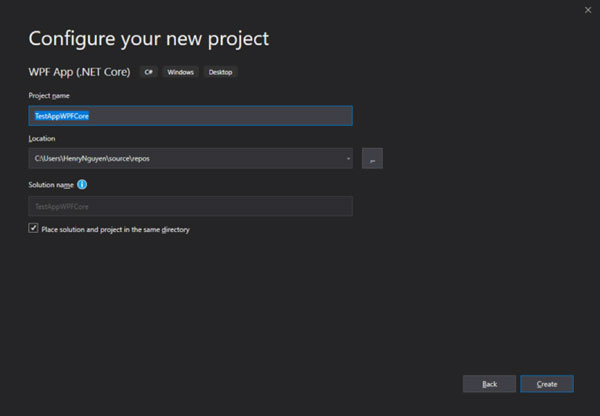
Click “Next” then go ahead and name your new project and set your desired location.
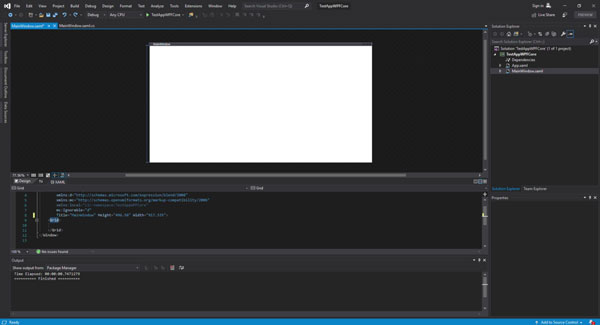
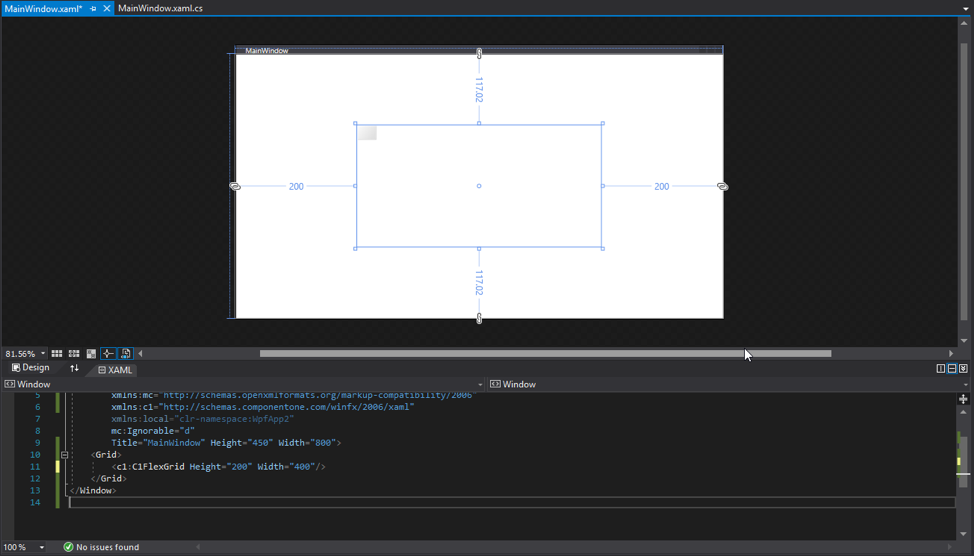
Recently full XAML designer support was added to the WPF .NET Core 3.0 Preview, so if you double click on your MainWindow.xaml you should get this split view with the designer and XAML.
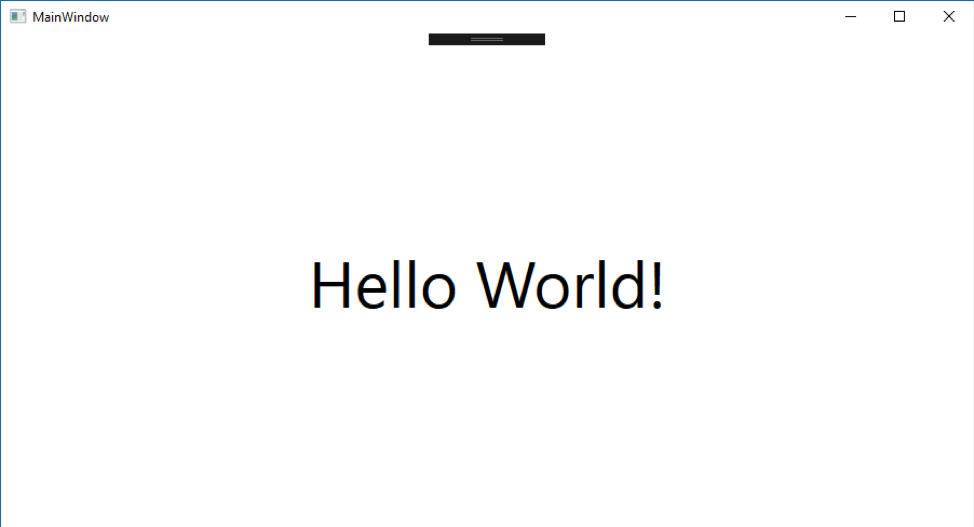
Now you can go ahead and run your application to make sure everything is working by pressing F5 or clicking on the “Run” button.
Add a ComponentOne WPF Edition Control to a .NET Core 3.0 project
Now that our project is all set up and running successfully, we can start to edit our project and add a ComponentOne WPF control to our MainWindow. The ComponentOne WPF controls cannot be dragged straight from the toolbox yet when working with .NET Core 3.0, but they can be manipulated in the designer once we’ve manually added the references and some basic XAML.
First, we will need to manually add the references for the control we want to use. In this case, I am going to use FlexGrid.
Right-click on “Dependencies” under your project file in the “Solution Explorer,” then select “Add Reference…”

Next click “Browse…” then navigate to the directory of your ComponentOne WPF controls. By default this directory is Program Files (x86)\ComponentOne\WPF Edition\bin\v4\
For my FlexGrid example I will need C1.WPF.4.dll and C1.WPF.FlexGrid.4.dll.
With our dependencies ready to go we can now go ahead and add the ComponentOne namespace to our MainWindow.xaml. Simply paste the following where the rest of the namespaces are defined for the window:
xmlns:c1= 'schemas.componentone.com/winfx/2006/xaml'
Now that we have everything the project needs to recognize the ComponentOne Studio controls, we can go ahead and add some simple XAML to define the control we want and start working with it in the designer.
For my FlexGrid example I will add the following within the
“<Grid></Grid>” element:
<c1:C1FlexGrid Height="200" Width="400"/>
You should now be able to see your control in the designer view on the MainWindow.xaml!
(Note: If the control shows up as a white box with a yellow outline this means the designer is not aware of the references and namespace yet. Simply rebuild the project to resolve this issue.)
Your project and ComponentOne WPF control should now be fully functional, but you will receive a ComponentOne nag screen upon running the application.
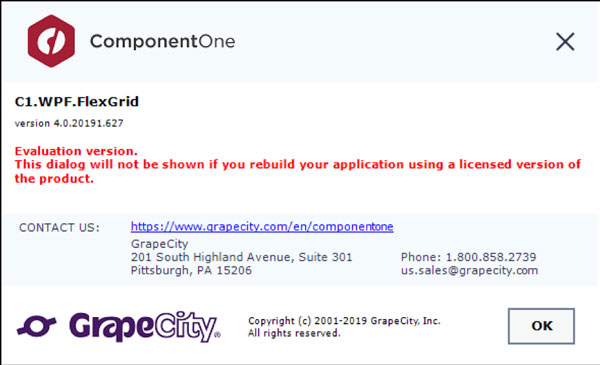
We can fix this by adding a licenses.licx to the project with the proper entries for the controls we are using.
Right-click on your project in the “Solution Explorer”, select “Add” then “New Item…” and scroll down to “Text File”. Name this new file “Licenses.licx” (it must be named exactly this).
After the file is created, click on your new Licenses.licx and make sure the “Build Action” property is set to “Embedded resource.”
Now we can go ahead and add the entries to our Licenses.licx for each control that we are using in the project.
In my example I'll be using the following for FlexGrid:
C1.WPF.FlexGrid.C1FlexGrid, C1.WPF.FlexGrid.4
Note: If you do not know what entries need to be there for your control, I recommend creating a new WPF .NET Framework project then dragging the control onto the MainWindow.xaml from the toolbox. This will automatically generate a licenses.licx entry for the control and you can just copy and paste that entry to the .NET Core 3.0 project’s Licenses.licx. This functionality will eventually be available for .NET Core 3.0 as well.
Rebuild your project, press F5 or the “Run” button to test it out and you should be good to go with your very first WPF .NET Core 3.0 application with a ComponentOne Studio control!
Migrating an existing project to .NET Core 3.0
It is possible to convert an existing .NET Framework project o .NET Core 3.0, but it does require quite a few steps. Before attempting a migration, it is also worth running Microsoft’s portability analyzer tool on your project before you get in over your head. The tool will predict how compatible your project is with .NET Core 3.0 and will let you now if you are using unsupported APIs.
The easiest way to start is by creating a brand new WPF .NET Core 3.0 project with the exact same name as the old project. For my example I will be working with the FlexGrid101 sample. Please read over the first few steps in this blog under the “Create a new Visual Studio project” section if you do not know how to create a new WPF .NET Core 3.0 project.
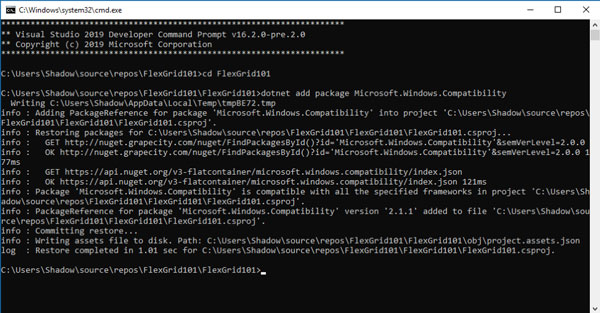
After that, open the “Developer Command Prompt” by Clicking the “Tools” tab in the Visual Studio top-bar, then “Command Line” and finally “Developer Command Prompt”. With that open, type the following commands to move to the correct directory and then add the Windows Compatibility package.
cd YourProjectName
dotnet add package Microsoft.Windows.Compatibility
If everything goes well and there are no errors your output should look like the screenshot below. If you get an error, make sure your command line is in the correct directory. Adding the Compatibility package will only work if you are currently in the directory containing your project file.
Next, we need to replicate the structure of our old project. The first thing we’ll replicate is the assemblies. In my FlexGrid101 example the project is referencing the following:
C1.WPF.4, C1.WPF.DateTimeEditors.4, C1.WPF.FlexGrid.4, C1.WPF.FlexGrid.GroupPanel.4, C1.WPF.FlexGridFilter.4, C1.WPF.Gauge.4, and C1.WPF.Zip.4.
Right-click on “Dependencies” under your project file in the “Solution Explorer”, then select “Add Reference…”
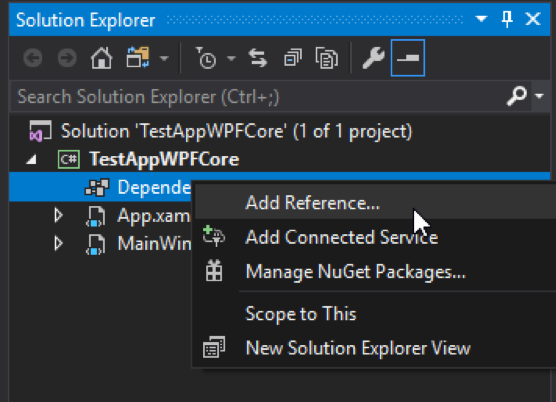
Next click “Browse…” then navigate to the directory of any dependencies you need to add. If you are using any ComponentOne WPF controls by default this directory is Program Files (x86)\ComponentOne\WPF Edition\bin\v4.
Next, we’ll need to add all the folders and their contents from our old project to the new project. The easiest way to do this is to just open the directory of the old project in the file explorer then copy and paste all the folders into your new project in the same location.
In my FlexGrid101 sample I’ll need to move the CellFactory, Data, Images, Properties, Resources, Themes, View, and ViewModel folders. We also need to copy the MainWindow.xaml and MainWindow.xaml.cs files into the new project.
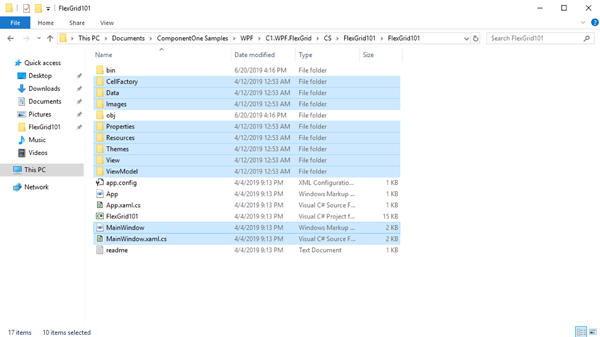
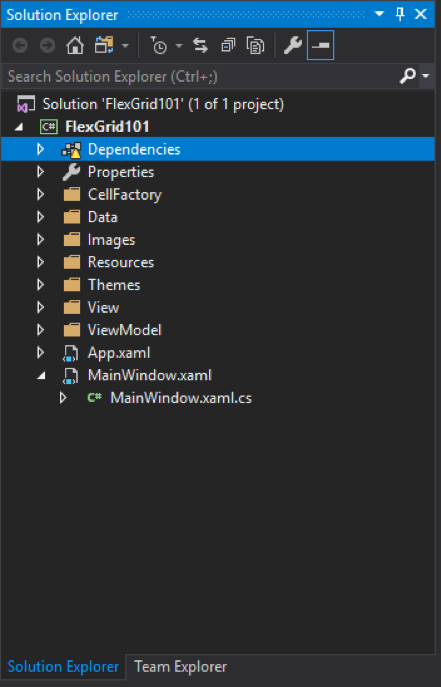
After copying the files over, verify that everything has appeared in the Visual Studio “Solution Explorer” and nothing is grayed out. If something is grayed out, right click on it and select “Include in Project.”
Now that all our files are in the new project, we’ll need to make a small change to our project file itself. Rich click on your project file in the “Solution Explorer” and select “Unload Project”. Click on it again and select
“Edit <yourprojectname>.csproj”.
Within the “PropertyGroup” node you will just need to add this line:
<Generateassemblyinfo>False</Generateassemblyinfo>
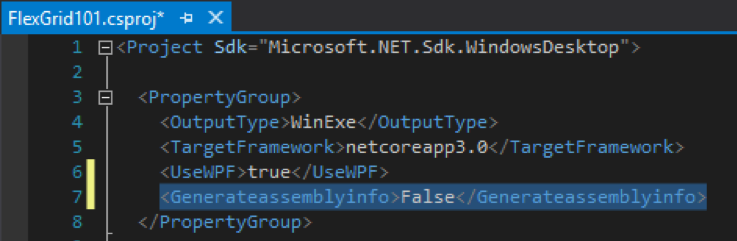
Save your project then right click on the project file again and select “Reload Project.”
Finally, we need to be sure that certain file types are included into the project correctly by setting the Build Action. This part could be pretty different depending on what you’re doing in your project.
In my FlexGrid101 sample I’ll need to do the following:
For the “Licenses.licx” file (which is inside the “properties” folder) make sure the “Build Action” (set inside the “properties” panel) is marked as “Embedded resource.”
Inside the Images folder, we’ll also need to change the “Build Action” to “Content” for each image as wells as the “Copy to Output Directory” option to “Copy if newer.” Finally, in the Resources folder be sure to change the “Build Action” for data.zip to “Embedded resource.”
Rebuild your project and you should now be able to run it!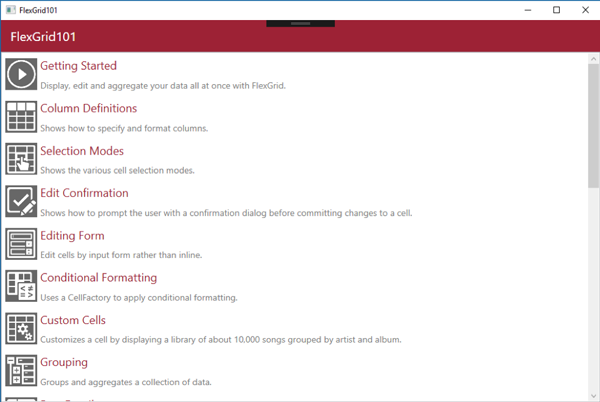
Keep in mind, every project is different. You may have more or less steps (depending on what is in yours) but this should give you a pretty good idea of what to expect when converting a mostly compatible project from .NET Framework to .NET Core 3.0.

Alec Gall