When Vue 3 and Vue's Composition API released, we released an article outlining how you can take advantage of the new features of the API and improve code organization, readability, and reusability, allowing developers to more efficiently manage larger-scale applications.
In this article, we'll be going over how you can use the Composition API along with Wijmo's component library to create and manage Vue datagrids easily.
As a refresher, we'll quickly go over how you can use the Composition API in your Vue application. Then we'll get into how you can incorporate Wijmo's Vue DataGrid, FlexGrid, into your application.
The Composition API
When creating a component in Vue, it used to be broken up by component options (data, computed, methods, watch, etc.):
export default {
    components: { ... } // List of components that our component will be using
    props: {
        user: {
            type: String,
            required: true
        }
    },
    data() {
        return {
            users: [],
            filters: { ... },
            query: '',
        }
    },
    methods: {
        getUser() {
            // get the user based on our 'user' prop
        },
        getUserList() {
            // get list of users associated with current user
        },
        updateUser() {
            // updates users values
        },
        deleteUser() {
            // deletes user from db
        }
    },
    mounted() {
        this.getUser()
    }
}
This type of organizational logic will work in most cases. Still, as components get more significant, more logic is added, and the component becomes more complicated, making it harder to read and understand. For enterprise applications with numerous developers modifying code, it's important that your code is easily readable and understood.
Because the component options are broken up, code begins to fragment, with logical concerns scattered throughout the component. This separation of options can obscure the underlying logic of your component. This will also cause developers to jump around the file when working on the component, with its logic scattered throughout the component.
This is where the Vue Composition API comes in!
export default {
    components: { ... } // List of components that our component will be using
    props: {
        user: {
            type: String,
            required: true
        }
    },
    setup(props) {
        getUser() { ... },
        getUsers() { ... },
        updateUser() { ... },
        deleteUser() { ... },

        return { getUser(), updateUser(), deleteUser() }
    }
}
When using the Composition API, we use the setup() method, which encompasses our component's logic. Inside of this method, we can group our logic however we want! For example, when getting the list of users:
setup(props) {
    getUsers() { ... },

    // Getting list of associated users
    users: []
    getUsers() {
        // retrieves our list of associated users
    }

    updateUser() { ... },
    deleteUser() { ... },

    return { users, getUsers() }
}
As you can see, instead of declaring the users variable in the data() component option, we are declaring it right before our getUsers method, grouping the logic for retrieving users from our database.
Implementing FlexGrid with the Composition API
Now that we've gone over the basics of using the Composition API and its setup() method, let's look at how we can implement Wijmo's Vue DataGrid with the Composition API.
The first thing that we'll need to do is install Wijmo and import it into our Vue file. To install Wijmo, simply run npm install @grapecity/wijmo.all. Your application will then reach out to NPM and install Wijmo's modules.
Next, you'll need to import both Wijmo's styles, as well as the modules that you'll want to use. We'll do this at the top of the script tag:
<script>
import '@grapecity/wijmo.styles/wijmo.css';
import { WjFlexGrid, WjFlexGridColumn } from '@grapecity/wijmo.vue2.grid';
import { CollectionView } from '@grapecity/wijmo';
export default {
    components: {
        WjFlexGrid,
         WjFlexGridColumn
    },
    name: 'DataGrid',
    setup() { ... }
}
</script>
For this sample, we'll start by using the WjFlexGrid and WjFlexGridColumn modules, which will be used to create the FlexGrid control, and the CollectionView, which we'll be using as our data source for the Vue DataGrid.
We'll now generate some data to put into the FlexGrid, and store that inside of a CollectionView:
setup() {
    // Creating the data used in FlexGrid
     let countriesList = "US,Germany,UK,Japan,Italy,Greece".split(",");
     let data = new CollectionView(getData(countriesList), {})
    function getData(listOfCountries) {
        let data = [];
        for(let i = 0; i < 100; i++) {
            data.push({
                id: i,
                country: listOfCountries[i % listOfCountries.length],
                sales: Math.random() * 10000,
                expenses: Math.random() * 5000
            });
        }
        return data;
    }
    return { data }
}
We'll also add some styling to the grid to make it look nicer when we render it onto the screen:
<style>
.wj-flexgrid {
width: 800px;
height: 500px;
}
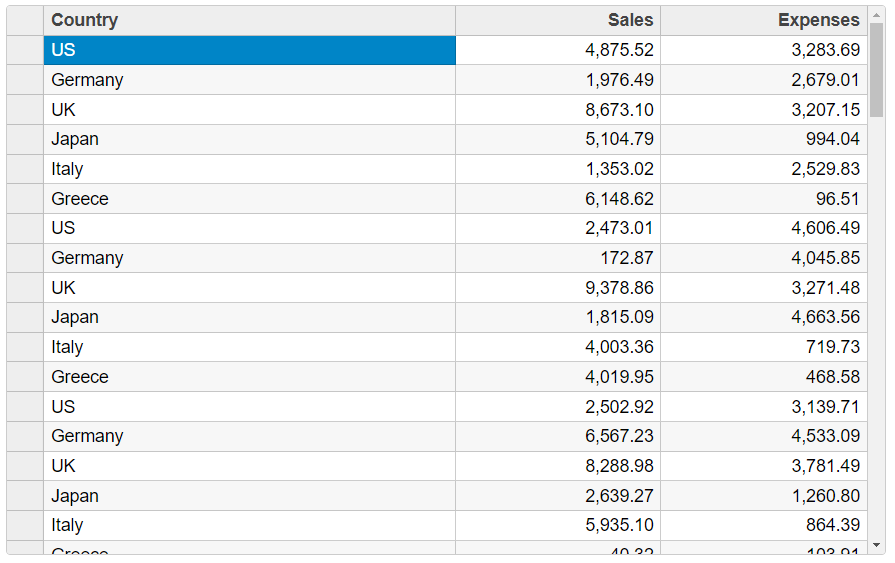
</style>Finally, we'll add the HTML that will render the FlexGrid control:
<template>
    <div>
        <wj-flex-grid :itemsSource="data">
            <wj-flex-grid-column :header="'Country'" :binding="'country'" width="2*" />
             <wj-flex-grid-column :header="'Sales'" :binding="'sales'" width="*" format="n2" />
             <wj-flex-grid-column :header="'Expenses'" :binding="'expenses'" width="*" format="n2" />
        </wj-flex-grid>
    </div>
</template>
Now, when we run our application, our FlexGrid will render as such:
Now that we've implemented our FlexGrid let's look at how we can implement some of the Vue DataGrid's features to improve user interaction with the control.
Vue DataGrid Features
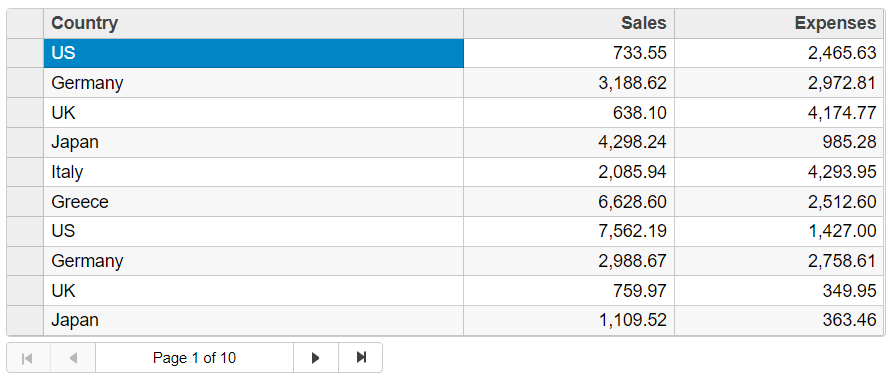
Since we are displaying a fair amount of data in our FlexGrid, the first thing that we'll implement is paging. To do so, we'll import the CollectionViewNavigator and set the page size for the CollectionView:
<wj-collection-view-navigator headerFormat="Page {currentPage:n0} of {pageCount:n0}" :byPage="true" :cv="data" />
....
import { WjCollectionViewNavigator } from '@grapecity/wijmo.vue2.input';
....
let data = new CollectionView(getData(), {
    pageSize: 10
})
The CollectionViewNavigator takes a header format, which we'll be using to display the number of the current page the user is on and the same data source that the FlexGrid control is using. We're also assigning a value to the CollectionView's pageSize property, where our Vue DataGrid will display ten values per page. When we run our application, the FlexGrid looks as such:
The final two features that we'll be looking at are DataMaps and Aggregation. Incorporating datamaps in FlexGrid is very straightforward; we'll need the list of items that we'll use in the datamap dropdown.
We'll need to assign it to the dataMap property of the column that it is being assigned to. The nice thing is, we already have our list of countries that we used to generate the data so that we can add that to the return statement of our setup() method and assign that to the dataMap property of the country column:
<wj-flex-grid-column :header="'Country'" :binding="'country'" width="2*" :dataMap="countriesList" />
....
setup() {
    let countriesList = "US,Germany,UK,Japan,Italy,Greece".split(",");
    ....
    return { data, countriesList }
}
Now, when we run out the application, we'll have access to the datamap within the country column, allowing users to change the "country" values of the rows easily:

The last thing that we'll look at is data aggregation. To aggregate the Sales and Expenses columns, we'll need to incorporate FlexGrid's initialized event, which gets called when the FlexGrid control is initialized.
We'll create a method that we tie to the grid's initialized event, and within that method, we'll set up our data aggregation. We'll also set the aggregation type on each column that we want to aggregate; in this case, we'll be setting the aggregate type to Sum on both the Sales and Expenses column.
<wj-flex-grod :itemsSource="data" :initialized="initializedGrid">
    <wj-flex-grid-column :header="'Country'" :binding="'country'" width="2*" :dataMap="countriesList" />
    <wj-flex-grid-column :header="'Sales'" :binding="'sales'" width="*" format="n2" aggregate="Sum" />
    <wj-flex-grid-column :header="'Expenses'" :binding="'expenses'" width="*" format="n2" aggregate="Sum" />
</wj-flex-grid>
....
import * as wjcGrod from '@grapecity/wijmo.grid';
....
setup() {
    ....
    // sets up a row to be used for data aggregation
    function initializedGrid(flex) {
        flex.columnFooters.rows.push(new wjcGrid.GroupRow());
        flex.bottomLeftCells.setCellData(0, 0, 'Σ');
    }
    return { data, countriesList, initializedGrid }
}
When we run our application, we'll see our data aggregated at the bottom of our FlexGrid. Even though we're using paging, the aggregation will show the aggregated data across all of the pages.

For a complete breakdown of the code that we've written for our application, you can take a look down below:
<template>
  <div>
    <wj-flex-grid :itemsSource="data" :initialized="initializedGrid">
        <wj-flex-grid-column :header="'Country'" :binding="'country'" width="2*" :dataMap="countriesList" />
        <wj-flex-grid-column :header="'Sales'" :binding="'sales'" width="*" format="n2" aggregate="Sum" />
        <wj-flex-grid-column :header="'Expenses'" :binding="'expenses'" width="*" format="n2" aggregate="Sum" />
    </wj-flex-grid><br>
    <wj-collection-view-navigator headerFormat="Page {currentPage:n0} of {pageCount:n0}" :byPage="true" :cv="data" />
  </div>
</template>

<script>
import '@grapecity/wijmo.styles/wijmo.css';
import { CollectionView } from '@grapecity/wijmo'
import { WjFlexGrid, WjFlexGridColumn } from '@grapecity/wijmo.vue2.grid';
import { WjCollectionViewNavigator } from '@grapecity/wijmo.vue2.input';
import * as wjcGrid from '@grapecity/wijmo.grid';
export default {
  components: {
    WjFlexGrid,
    WjFlexGridColumn,
    WjCollectionViewNavigator
  },
  name: 'DataGrid',
  setup() {
    let countriesList = "US,Germany,UK,Japan,Italy,Greece".split(",");
    let data = new CollectionView(getData(countriesList), {
        pageSize: 10
    })
    // create some random data
    function getData(listOfCountries) {
        let data = [];
        for (let i = 0; i < 100; i++) {
            data.push({
                id: i,
                country: listOfCountries[i % listOfCountries.length],
                sales: Math.random() * 10000,
                expenses: Math.random() * 5000
            });
        }
        return data;
    }
    // called when the grid is initialized
    function initializedGrid(flex) {
        flex.columnFooters.rows.push(new wjcGrid.GroupRow());
        flex.bottomLeftCells.setCellData(0, 0, 'Σ');
    }
    return { data, countriesList, initializedGrid }
  }
}
</script>
<style>
.wj-flexgrid {
    width: 800px;
}
</style>
Closing Notes
With the release of the Composition API, the Vue team aimed to improve code reusability and readability, allowing developers to order their code more logically than the component options setup. With these changes, implementing Wijmo's Vue DataGrid, FlexGrid, has become much simpler with the Composition API's setup() method.
Suppose you would like to try out Wijmo's component library with your Vue application. In that case, you can either download the library here or look at our documentation to see how you can install the library via NPM. If you have any questions, please ask them in the comments section below.
Happy coding!
Tags:
Related Blogs
Try Our JavaScript UI Components & Datagrid

Joel Parks